WICACHO: A project for semantic tagging
Version: April 24, 2026 . This new version works both in Linux and Windows.
|
Announcement: we are about to present a new version that combines
the two semantic taggers that have so far been published by Tecling.com: Tatatag (2025), the tagger that uses Wiktionary, and Wicacho (2026), the very one you are looking at now, that uses Wikipedia. The new version is called Wikacho and as soon as it gets published, the two predecessors will then be casted as deprecated and no longer maintained.
|
Server temperature now: 35ºC (demo disabled if temp. > 55ºC)
Examples: 1, 2, 3, 4, 5, 6, 7, 8, 9, 10
©TECLING 2026.
This website offers documentation, code, data and web-demo of the semantic tagger described in the following paper:
Nazar, R.; Renau, I. (2026). Wikipedia used as a semantic tagger: some preliminary results in Spanish. Procesamiento del Lenguaje Natural, n. 76, p. 279-292.
Documentation and source code
Before you use this, bear in mind that this is all very experimental and things may fail from time to time. Also, it is advisable to take a look at the paper before anything else. We will do our best to keep this documentation clear and up to date. If you find some error or you need help, send an email to rogelio dot nazar at gmail dot com
Step 0: Dependencies
The Perl interpreter: If you are a Windows user, you will
need to install Perl. We tested the code in Windows and it works well, but it is necessary to have the Perl interpreter on the machine it is running on.
In the case of Windows users, sadly it needs to be installed separately,
given the fact that it does not come by default in the operating system, as in the case of Linux and other Unix-like environments.
Among other options, Windows users can download and install the Perl interpreter for free, from here: https://strawberryperl.com/
The POS-tagger: Wicacho uses UDPipe, which also needs to be installed independently from here: https://ufal.mff.cuni.cz/udpipe. Wicacho does not use the POS-tagger for the generation of the models, though, because it would be too costly. If you want to use a different POS-tagger, it must either comply with the
Universal Dependencies
standard, or you would have to adapt Wicacho's code of to ensure compatibility.
Instructions for running the semantic tagger
Step 1: Download the code
If you just want to use the semantic tagger in your local PC,
download and unzip the code, data and model files:
The content of the data and model files must be placed in a 'data'
folder in the same place as the source code, or, if you prefer, change the
code to read the data from somewhere else.
Step 2: Adjust paths to the location of the POS-tagger on your machine
You may have to adjust the code to make sure the paths to the installation
of the POS-tagger are correct. Search for the $postagger and $langmodel variables, defined like this:
my $postagger = "/opt/udpipe/src/udpipe";
my $langmodel = "/opt/udpipe/languages_models/spanish-ancora-ud-2.5-191206.udpipe";
For efficiency, the program avoids applying the POS-tagger twice to the same text.
A file 'input.txt.tag' is created the first time you apply wicacho.pl to a text 'input.txt',
containing the result of the POS-tagger, so the next time you analyze the same
text (for instance, after making changes in the script), before it calls the
POS-tagger, it will see if there is some file with the same name but with the '.tag' extension added, and if so, it will assume it is the same document.
Step 3: Run the semantic tagger
Once you have a POS-tagger up and running, you can run the tagger with the following command:
perl wicacho.pl input.txt (Spanish) > output.htm
The first argument, input.txt, must be a UTF8-encoded Spanish text file.
The 'Spanish' argument is not needed, as for the moment it is the only language
it can operate with. The output of the script is an html file
like those you see on the demo.
For the time being, the system process one document at a time
(be patient: the new version, coming soon, allows for batch processing of folders).
Happy tagging!
Instructions for the generation of models
Step 1
In order to replicate the generation of the models, download the above mentioned
source code and
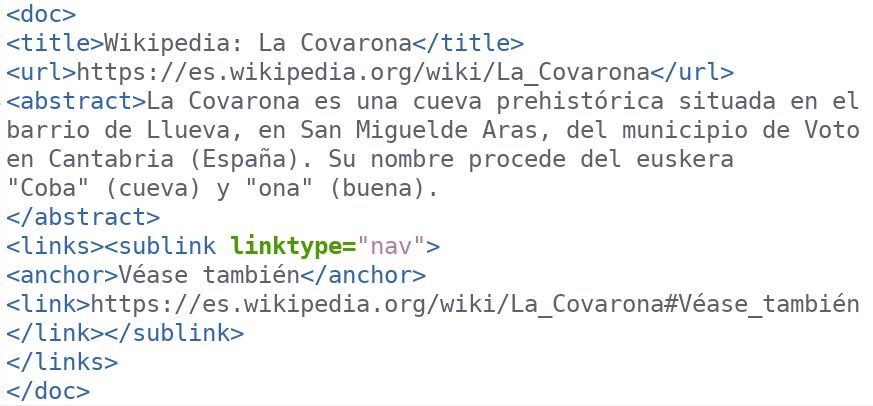
data files, plus a copy of the Wikipedia index file (eswiki-20241020-abstract.xml, compressed as eswikiabstractszip.zip to 250Mb), an XML document that contains only the title and the first paragraph of each page. It may look something like this:
Step 2
Run the conversion script:
perl xml2csv.pl eswiki-20241020-abstract.xml > wikitable.csv
This script strips all the XML code out of the Wikipedia file and presents
a table with one entry per line.
Step 3
In order to generate the models you need first to delete
any eventual past model or comment the lines in the code where these
models are defined (where the %files hash is declared). This is because
the training of the program has two phases, and the absence of models
makes the program think it is in the first phase.
The only data neeed for this first phase of the training is the 'hard-coded'
data, i.e., the data files with the '.txt' extension, contained in the data.zip
file. Place the unzipped data in the same folder as the Perl scripts and run:
perl wicacho.pl -train wikitable.csv > raw.csv
This script assigns every Wikipedia entry to one of the categories of the
CPA Ontology. It is, thus, an information extraction and word sense disambiguation process.
It may take well up to 30 minutes for the training to complete, depending on your hardware.
Here is a random sample of 1000 results. The sample shows 97% precision and 64% recall. Recall is low at this point but this is not a problem, because the leftovers will be reanalyzed in the second pass of the training, after the statistical models are generated.
Step 4
Generate the first statistical model:
perl model.pl raw.csv > model-31march2026.csv
This script takes only a few minutes to execute.
Step 5
Generate the second statistical model:
perl morfeo.pl raw.csv > strongpairs.csv
This one takes only seconds to execute.
The script Morfeo is part of another of our projects,
which we hope will be documented soon with its own website.
In the meantime, we use this version of the script as
a complement of Wicacho's statistical model.
This version of Morfeo actually produces two results.
One is the output that gets written ( strongpairs.csv ), which is
a list of strong hyponym-hypernym pairs extracted from raw.csv,
and the other is a model of suffixes, silently produced by the
script. You will find this model in the same folder and the
name follows this pattern: morfodel-1773603880.csv, where
the number is the result of the time() function (number of
seconds since 'the Epoch').
Step 6
In this step we are going to apply the second phase of the training procedure, this time
using the statistical models just generated. This is to increase the proportion
of classified Wikipedia entries by retrying to classify those that were left
with the UNKNOWN tag in step 3.
It is necessary, at this point, to manually edit the code of the wicacho.pl
script. Find the lines where the %files hash table is declared and update the file names with those you just generated.
my %files = (
'pila' => 'masterPil.txt',
'apellido' => 'masterSurname.txt',
'lugar' => 'masterPlace.txt',
'stoplist' => 'stoplist.txt',
'semtypes' => 'semantypes_es.txt',
'triggers' => 'triggers_es29mar2026.txt',
'model' => 'model-31march2026.csv',
'morfeo' => 'morfodel-1773666228.csv',
'strongpairs' => 'strongpairs.csv',
);
Specifically, you have to update the filenames of the keys
'model', 'morfeo' and 'strongpairs', i.e., the names of the
statistical models just created.
Notice that there is a difference between
files with the .txt extension and those with .csv: the first ones are those that are ``hard-coded'' into the system, while the latter are generated during training.
perl wicacho.pl -train raw.csv > database.csv
The execution is similar to what was done in step 3, the difference
being that now the input file is raw.csv (the result of step 3) and
the output is a new file database.csv, which is the new result.
This new result is similar to raw.csv, but with a new column
after the category initially assigned. Many times the new category
is the same as the originally assigned, but it also happens very frequently that
the category was initially UNKNOWN and the statistical model in those cases is
able to risk a category and improve recall. This is the file that will be used
in the final step.
Step 7, and final
You have created all the necessary materials so you are ready to apply the semantic tagger to any text in Spanish.
The only task left is to open again the wicacho.pl script and add the line defining the database (the file that resulted from step 6):
my %files = (
'pila' => 'masterPil.txt',
'apellido' => 'masterSurname.txt',
'lugar' => 'masterPlace.txt',
'stoplist' => 'stoplist.txt',
'semtypes' => 'semantypes_es.txt',
'triggers' => 'triggers_es29mar2026.txt',
'model' => 'model-31march2026.csv',
'morfeo' => 'morfodel-1773666228.csv',
'strongpairs' => 'strongpairs.csv',
'database' => 'database.csv',
);
This only needs to be done once, the first time you use it.
Afterwards, you can tag all the text you want using the same configuration.
For instructions on how to run the semantic tagger go to the beginning
of this document.